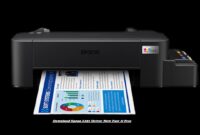
Best Print Settings for Epson L120: Guidance on optimizing print settings for various types of documents and images. The Epson L120 is a compact and affordable inkjet printer designed for home and small office use. While this printer offers a great balance between affordability and performance, achieving the best print results requires careful consideration of various print settings.

In this article, we will guide you through optimizing print settings for different types of documents and images using the Epson L120 Printer.
Step 1: Epson L120 Check and prepare your printer
Before diving into the specific print settings, it’s important to make sure your Epson L120 is in good working order. Here are the steps to get you started:
- 1.1. Ink levels: Check the ink levels in your printer’s ink tanks. Make sure you have enough ink for your printing needs.
- 1.2. Paper Load: Load the appropriate type and size of paper in the paper tray. The Epson L120 can handle various types of paper, including plain paper, photo paper and envelopes. Make sure the paper is properly aligned.
- 1.3. Driver Installation: Make sure you have installed the correct printer driver for your operating system. You can download the latest driver from the Epson website.
Step 2: Optimize printing settings for documents
Now let’s explore the best printing settings for text documents:
- 2.1. Quality: For standard text documents, the “Text” or “Draft” quality settings should be sufficient. These settings use less ink and are faster for simple text-based printing.
- 2.2. Paper Type: Select Plain Paper unless you are printing on special paper. This setting ensures proper ink absorption.
- 2.3. Print Mode: Select “Standard” for most text documents. However, if you need higher quality, select “Best” for sharper text and better graphics.
- 2.4. Color Options: If you don’t need color printing for text documents, choose Black & White or Grayscale to save color ink.
Step 3: Optimize printing settings for pictures and photos
When it comes to printing images and photos, different settings are required for the best results:
- 3.1. Quality: For photos, select the highest quality setting, usually labeled “Best Photo” or “Photo RPM. This setting produces vibrant colors and sharp details.
- 3.2. Paper Type: Select the appropriate paper type for your image. For standard photo paper, select “Photo Paper” or the specific brand/type of photo paper you’re using.
- 3.3. Print Mode: Use Photo mode for high-quality photo prints. This mode optimizes color balance and resolution for photographic output.
- 3.4. Color Options: Be sure to select Color to print photos in their full color spectrum.
Step 4: Epson L120 Print Preview and Adjustments
Always preview your document or image before you print it. Most applications allow you to review the document and make adjustments if necessary. Pay attention to margins, page layout, and scaling so there are no surprises when you print.
Step 5: Save your custom print settings
Once you’ve found the optimal settings for your documents and images, consider saving them as custom presets in the printer driver. This can save you time on future print jobs with similar requirements.
Conclusion:
Optimizing the print settings for your Epson L120 printer can significantly improve the quality and efficiency of your prints. By carefully selecting the right quality, paper type, print mode, and color options, you can ensure that your documents and images look their best. By following the steps outlined in this article, you’ll be able to get the most out of your Epson L120 printer for a variety of printing tasks.


